
Seedpirat Grow Guide: The Most Important Basics at a Glance
Anyone who starts exploring this topic quickly notices that there is no single point that explains everything. Instead, many things are connected. The Seedpirat Grow Guide helps you understand these connections more clearly.
The most important basics include:
Genetics
Flowering time
Germination rate
Autoflower
Feminized seeds
Delivery time and shipping
Supplier transparency
Many users first focus only on individual keywords or eye-catching promises. But that is exactly what often causes people to lose the bigger picture. That is why the Seedpirat Grow Guide deliberately focuses on structure. Instead of throwing everything together, terms and topics are explained in a way that helps you recognize more quickly what actually matters and what is mostly just marketing.
Why a Clear Overview Matters More Than Half-Knowledge
One of the biggest problems when it comes to growing is not a lack of information, but the exact opposite: there is too much of it. The real difference is whether information actually helps you or only confuses you even more.
The Seedpirat Grow Guide is designed to take that noise out of the picture. Once you understand the basics properly, you can place information much more clearly. Then you will recognize more quickly:
which terms are truly relevant,
which details sound meaningful,
which claims seem exaggerated,
and which information actually helps when comparing with other sites.
A clear overview saves time, avoids unnecessary confusion, and gives you a more stable sense of direction while reading and comparing.
Which Terms Matter Most in the Seedpirat Grow Guide
The Seedpirat Grow Guide focuses on exactly the terms that appear again and again in everyday use and often cause confusion. These include:
Autoflower
Flowering time
CBD
Discreet shipping
Authenticity
Feminized seeds
Genetics
Help & guidance
Indica / Sativa / Hybrid
Young plant
Germination rate
Delivery time
Medical use
Each of these terms has its place. Some are directly related to seeds and suppliers, while others help you classify claims and statements you find online more accurately. That is exactly why the Seedpirat Grow Guide complements the Seedpirat Wiki: while the wiki explains individual terms briefly, this section keeps the bigger picture together.
What to Look for When Reading and Classifying Information
The Seedpirat Grow Guide is not only meant to give you terms, but also to help you develop a better sense of how to evaluate information. Pay special attention to these points:
Clear Language Instead of Fog
Good content explains clearly what something is about. If something sounds intentionally complicated or is made up mostly of advertising phrases, caution is usually a good idea.
Realistic Information
Very big promises, exaggerated numbers, or extremely simple “solutions” often sound stronger than they really are. That is why the Seedpirat Grow Guide focuses on understandable classification instead of loud effects.
Structure Instead of Chaos
When a page is logically built, explains terms, and makes connections clear, that is usually a good sign. That is exactly how the Seedpirat Grow Guide is intended to work: as a clear line instead of a mess.
Understanding Instead of Blindly Accepting
Not every piece of information has to be judged or believed immediately. Often, it is enough to first understand what a term actually means before continuing to read or compare.
Why the Seedpirat Grow Guide Is a Useful Addition
The Seedpirat Grow Guide is the calm counterpart to comparisons, reviews, and the wiki. While the comparison page mainly shows how suppliers and categories can be classified, this section helps you build the background knowledge behind them.
This is how everything works together:
Comparison page = overview and classification
Seed bank reviews = details and differences
Seedpirat Wiki = short term explanations
Seedpirat Grow Guide = connections, basics, and orientation
This way, you do not just get isolated pieces of information, but a much cleaner overall picture.
Short and Clear
The Seedpirat Grow Guide is here to give you an understandable introduction and an organized overview. Instead of overwhelming you with too much technical language or half-knowledge, you get the basics, the important terms, and the clear connections that matter.
If you want to quickly look up individual terms, the Seedpirat Wiki will help you. If you want to classify suppliers more clearly, the comparison page will take you further. The Seedpirat Grow Guide is the area in between: calm, understandable, and designed to make the course clearer.
Basics – Preparation & Planning
The first step to a successful grow doesn’t start with the seed – it starts with proper planning.
Many beginners underestimate how important preparation is – and end up losing time, nerves, and money. With the right planning, you ensure that your plants have the best possible conditions and that you’ll later enjoy a rich harvest.
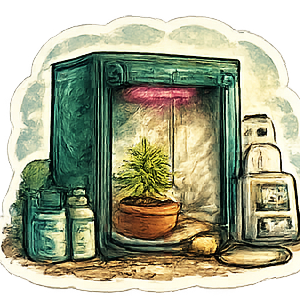
Indoor vs. Outdoor
Indoor: Full control over light, temperature, and humidity. Ideal if you want to grow independently of the seasons.
Outdoor: Requires less equipment but depends heavily on weather and location. Only possible in countries where cultivation is legal.
💡 Tip: Beginners usually find it easier to start indoors since mistakes are easier to correct.
Finding the right place
Indoor: Grow tent, cabinet, or dedicated room. What matters most is that you can control light, air, and temperature.
Outdoor: A sunny, sheltered location that’s not too wet or too shady.
Basic equipment (indoor)Grow tent or cabinet
Lighting system (LED or HPS)
Fan + carbon filter (for odor control and fresh air)
Timer (for lighting cycles)
Hygrometer/thermometer (to monitor climate)
pH tester (very important: soil 6.0–6.5, hydro 5.5–6.0)
Pots, soil, nutrients
You can find all the necessary equipment at Cap’n Kush – from tents to pH testers.
Legal notice
Cannabis cultivation is only allowed where it is legally permitted. Always check the laws in your country before you start.
Conclusion
Good planning leads to better yields. Before you begin, be clear about where you’ll grow, what equipment you’ll need, and how much time you can invest. With proper preparation, you lay the foundation for a successful grow.
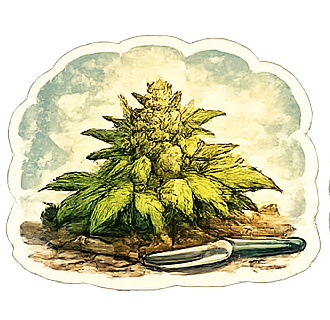
The Right Genetics & Seeds
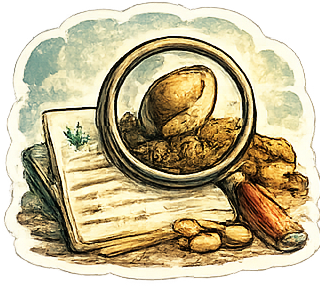
Choosing the right seed is one of the most important steps in growing. No matter how good your technique or equipment is – without the right genetics, you’ll never reach the plant’s full potential.
Feminized, Regular, or Autoflower?
Feminized:
These seeds are bred to produce almost exclusively female plants. Female plants carry the valuable buds – that’s why feminized seeds are perfect for beginners and for anyone who doesn’t want to waste space on “duds.”
Regular:
Classic seeds that can produce both male and female plants. They’re better suited for experienced growers or breeders who want to work with genetics. For most home growers, they tend to be unnecessarily complicated.
Autoflower:
These strains start flowering automatically after a certain period, regardless of light cycles. This makes them especially easy to handle – perfect for quick harvests and beginners who want minimal effort.
The downside: autoflowering plants often stay smaller and usually produce lower yields than feminized classics.
Selection Criteria
Genetics determine not only how your plant grows but also what kind of effects you can expect later. Pay attention to the following factors:
- Effect: Do you want something relaxing, creative, medicinal, or euphoric?
- Flowering time: Short flowering periods (e.g., 7–8 weeks) are ideal for impatient growers. Longer flowering times often result in more complex aromas.
- Yield: Some strains are real “mass producers,” while others stand out through quality and unique effects.
- Medical use: Many strains are specifically bred for pain relief, sleep issues, or stress reduction.
- Indica, Sativa, or Hybrid: Indicas stay compact and have more body-focused effects, Sativas grow taller and deliver more energetic highs. Hybrids combine the best of both worlds.
Where to Buy
Not every vendor delivers what they promise. That’s why at cansam.de, we only compare reputable and well-known seed banks – like Royal Queen Seeds, Barney’s Farm, or Dutch Passion.
This saves you from the hassle of fake seeds or shady shops.
👉 Tip: With our comparison, you can quickly find the strain that truly suits you – and if you need accessories, check out the Cap’n Kush Shop ⚓🌿.
Soil & Growing Medium – The Foundation for Healthy Plants
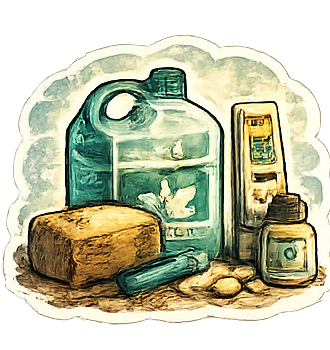
Choosing the right soil is one of the most important factors in growing cannabis. Many beginners underestimate this and simply grab the first bag of potting soil from the hardware store. But cannabis plants have special requirements for their growing medium.
Good soil should be light and airy, allowing roots to get plenty of oxygen. At the same time, it must be rich in nutrients to provide everything the plants need during their first weeks. Equally important is proper drainage – excess water must be able to flow out so that no waterlogging occurs. Waterlogging almost always leads to root rot, one of the most common mistakes in indoor growing.
Pre-fertilized or neutral?
There are two main types of soil:
Pre-fertilized soil:
Already contains enough nutrients for the first few weeks. It’s ideal for beginners, since you don’t have to worry much about feeding your plants early on.
Neutral soil:
Unfertilized, giving you full control over nutrient input – but you’ll need to supply fertilizers from day one. This option is better suited for experienced growers.
Alternatives to soil
In addition to classic soil, there are also coco substrates and hydroponic systems.
Coco offers a loose structure and promotes fast growth, but it requires a well-balanced feeding schedule.
Hydro systems deliver excellent yields but demand more knowledge and constant monitoring.
The pH value – invisible but crucial
No matter what medium you use, pH balance is key. In soil, the ideal pH is between 6.0 and 6.5.
If it’s too high or too low, your plants won’t be able to absorb essential nutrients – even if those nutrients are present.
That’s why a pH meter is part of every grower’s essential toolkit.
Conclusion
Good soil is the foundation for healthy plants and abundant harvests.
Those who focus on quality from the start and keep an eye on pH levels will avoid many common problems later in the grow.
Water, pH Value & Nutrients – Maintaining the Balance
Water is the foundation of every plant’s life. But when it comes to growing cannabis, too much can be just as harmful as too little. Many beginners make the mistake of “drowning” their plants or watering small amounts too frequently. The result: roots suffocate, mold forms in the substrate, and the plant’s growth stagnates.
How often and how much to water?
The right amount of water depends on several factors: pot size, substrate, plant age, and temperature.
A good rule of thumb: water only when the top 2–3 cm (about 1 inch) of soil are dry.
A tried-and-true method is to lift the pot – if it feels light, it’s time to water.
It’s better to water less often but thoroughly, until a bit of water runs out of the drainage holes.
Water quality
Not just the amount, but also the quality of the water plays a major role.
In many regions, tap water is quite hard and contains too many minerals. Over time, this can lead to buildup and disrupt the plant’s nutrient balance.
That’s why many growers measure not only the pH but also the EC value (electrical conductivity) to monitor salt levels.
Filtered or left-to-stand water is often better suited for growing.
pH value – the invisible key
The pH value determines whether a plant can even absorb nutrients.
Even if plenty of fertilizer is present, an incorrect pH can block nutrient uptake – this is known as nutrient lockout.
Ideal pH in soil: 6.0–6.5
Ideal pH in hydro or coco systems: 5.5–6.0
A simple pH meter or test strips are essential tools.
If the water is too acidic or too alkaline, use pH-Down or pH-Up solutions to adjust it.
Nutrients & fertilization
Cannabis has different needs at each growth stage:
- During the vegetative stage, the plant needs more nitrogen (N) for strong leaf and stem growth.
- During the flowering stage, it requires less nitrogen but more phosphorus (P) and potassium (K) to support bud formation.
Many growers use ready-made nutrient sets designed for each phase.
However, it’s important not to blindly follow the dosage instructions. Every plant reacts differently, and overfertilization happens quickly.
Early signs include yellow or brown leaf tips – a classic symptom of too much fertilizer.
Less is often more
A common beginner mistake is overfeeding.
Those who water and fertilize constantly under the motto “more is better” risk doing more harm than good.
It’s better to carefully observe your plant and gradually increase nutrient doses. This way, you’ll find the right balance.
Conclusion
Proper watering is an art in itself. It’s not just about pouring water into the soil, but about maintaining a balance between moisture, pH value, and nutrients.
Those who understand and control these three factors lay the foundation for vigorous growth and a successful flowering phase.
Light – The Engine of Growth
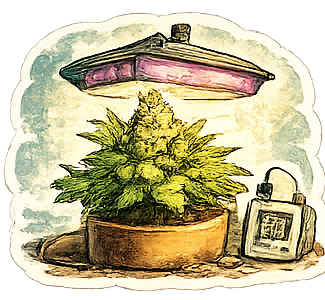
Without light, there is no life – and in indoor growing, light is the key engine driving both growth and flowering.
While outdoor growers rely on the sun, indoor gardeners must recreate it with artificial light sources that mimic natural sunlight as closely as possible. It’s not just about brightness – the right intensity, spectrum, and timing are crucial.
The Right Light Spectrum
Cannabis needs different types of light throughout its life cycle:
- Vegetative phase: Plants prefer a bluish spectrum (similar to a sunny spring day). This promotes strong leaf and stem growth.
- Flowering phase: Plants need a reddish spectrum (like late summer sunlight). This stimulates flower formation and increases yields.
Modern LED grow lights can adjust their spectrum precisely, providing ideal results for every phase.
LED, HPS, or Fluorescent Lights?
- LEDs have revolutionized the market in recent years. They’re energy-efficient, long-lasting, and produce little heat – perfect for small grow rooms. Many models now offer a full spectrum, covering all growth stages.
- HPS (High-Pressure Sodium) lamps are the classic choice. They deliver intense light but generate a lot of heat, which means you’ll need strong ventilation and higher electricity costs.
- Fluorescent tubes are mostly used for seedlings or clones, as they provide gentle but not very intense light.
Light Cycles – The Grow’s Rhythm
Indoors, the grower controls the “day and night” of the plants:
- Vegetative phase: 18 hours of light and 6 hours of darkness – this keeps the plants growing steadily.
- Flowering phase: 12 hours of light and 12 hours of darkness – this signals to the plant that “autumn” has arrived, triggering flower development.
Autoflower strains are the exception – they start flowering automatically after a few weeks, regardless of light cycles.
Distance & Intensity
Too much light can burn the leaves; too little results in weak, stretched plants. Every lamp has a recommended distance from the canopy – follow it carefully.
A simple trick is the hand test: hold your hand at plant height under the lamp. If it feels uncomfortably hot, the light is too close.
Outdoor: The Sun as Your Best Friend
Outdoor growers have it easier when it comes to lighting. A sunny, south-facing spot is ideal.
Plants that receive several hours of direct sunlight daily will produce stronger, denser buds and significantly higher yields than those grown in partial shade.
Conclusion
Light is the foundation of every successful grow. Indoor growers must carefully consider lamp type, spectrum, and light cycles.
Give your plants the right “sun,” and they’ll reward you with healthy growth and abundant blooms.
Outdoors, nature takes care of the lighting – as long as you choose the right location.
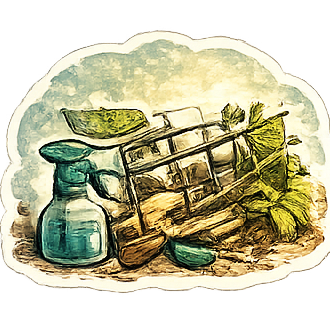
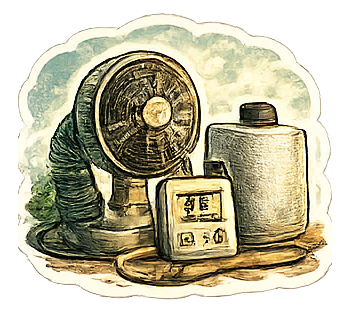
Air, Wind & Climate – Creating the Right Environment
Fresh air is just as important for plants as water and light. While humans need oxygen to breathe, cannabis plants primarily need carbon dioxide (CO₂) for photosynthesis. Only when the air is regularly refreshed and a healthy climate is maintained can they reach their full potential.
Why Air Circulation Is So Important
In enclosed grow rooms, plants quickly consume the available CO₂, and without replenishment, growth stagnates. In addition, humidity rises as the leaves transpire. If the air stands still, a warm and humid environment forms – ideal conditions for mold and pests.
Active ventilation not only replenishes CO₂ but also stabilizes temperature and humidity.
Exhaust Systems & Ventilation
The heart of any indoor grow is the exhaust system. A powerful fan removes stale air from the grow tent while fresh air flows in. Most setups include an activated carbon filter, which neutralizes odors – essential for keeping things discreet.
In addition, circulation fans are used to move the air inside the room, simulating a gentle breeze. This helps plants develop strong stems. Without this “artificial wind,” plants grow weak and may topple over easily.
Temperature & Humidity – Ideal Conditions
Cannabis thrives in a mild, stable climate. The optimal temperature range is 20–28 °C (68–82 °F). Short fluctuations are fine, but extreme heat or cold will weaken the plant.
Recommended humidity levels:
Vegetative stage: 50–70%
Flowering stage: 40–50%
A hygrometer is essential to keep both temperature and humidity in check.
Outdoor Grows – Wind as a Natural Ally
Outdoor growers benefit naturally from wind and weather, though there are also risks: strong storms can break branches, and constant rain encourages mold. A sunny, sheltered location with good airflow is ideal.
Conclusion
A healthy climate is the invisible foundation of every successful grow. Without fresh air and stable conditions, even the best seeds, lights, and nutrients can’t perform at their best. Controlling temperature, humidity, and airflow creates the perfect growing environment – indoors or outdoors.
Plant Care & Training – Increasing Yields Through Proper Technique
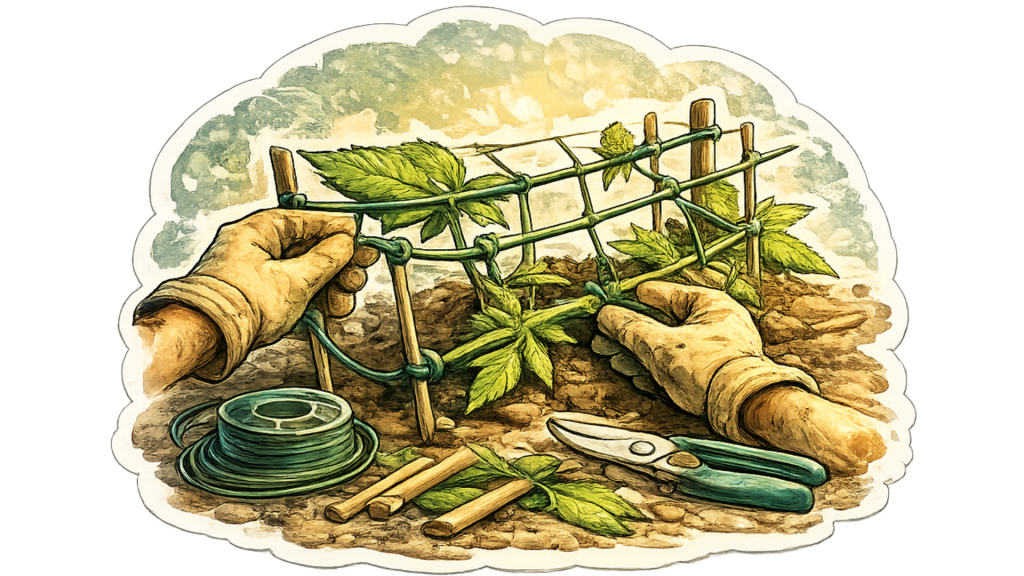
Cannabis naturally grows like a Christmas tree: one dominant main stem surrounded by side branches. This shape is typical but not always optimal if you want to maximize yields. With proper care and training techniques, growers can shape plant growth, improve light exposure, and dramatically increase harvest results.
Observation – The Most Important Routine
Before starting any training, observe your plants daily. Even small changes in leaf color or shape can indicate nutrient deficiencies, pests, or disease. Vigilance is the foundation of good plant care.
Low Stress Training (LST)
In LST, branches are gently bent and tied down so that more light reaches the lower parts of the plant. The plant stays shorter but produces more evenly developed buds – ideal for small indoor tents.
High Stress Training (HST)
HST involves intentionally topping or slightly damaging branches to stimulate new growth and branching. This technique requires experience – done wrong, it can slow the plant down significantly.
Defoliation – Bringing Light Into the Canopy
Large fan leaves often block light from reaching lower bud sites. Selective removal improves light penetration and airflow, reducing mold risk. However, don’t remove too many leaves at once, as they still provide energy.
SCROG – Screen of Green
A SCROG setup involves stretching a net above the plants, guiding branches to grow horizontally. Over time, this creates a wide, even canopy where every bud site gets equal light – massively boosting yields.
Controlling Height & Structure
Without training, some strains grow tall while others stay bushy. Timely training helps you adapt the plant’s size and shape to your available space, whether it’s a small tent or a large basement room.
Conclusion
Proper care and training make the difference between an average and an exceptional harvest. Whether it’s gentle LST, precise defoliation, or the more advanced SCROG – guiding your plants instead of letting them grow freely leads to denser buds, higher yields, and healthier growth.
Pests & Diseases – Identify, Prevent, and Control
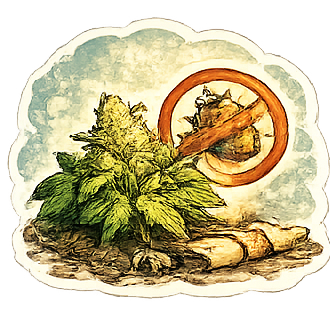
No matter how healthy cannabis plants look, they’re still vulnerable to many pests and diseases. The key to success: prevention, early detection, and targeted control.
The Most Common Threats
Spider mites:
Tiny spiders that live under leaves, recognizable by small white dots and fine webs.
Prevention: Keep humidity stable and check leaf undersides regularly.
Control: Use predatory mites or treat with neem oil.
Fungus gnats:
Small black flies that lay eggs in the soil; larvae feed on roots.
Prevention: Avoid overwatering and use yellow sticky traps.
Control: Apply nematodes or Bacillus thuringiensis israelensis (BTI) to kill larvae.
Mold & Botrytis:
A major threat during flowering, attacking dense buds.Prevention:
Keep humidity between 40–50% and ensure good air circulation.
Control: Remove and dispose of infected parts immediately.
Diseases & Deficiencies
Yellowing leaves, brown spots, or twisted stems often indicate pH imbalance or nutrient issues. Address the cause quickly to avoid spreading damage.
Cleanliness & Hygiene
Most problems arise from poor hygiene. Keep your grow space, soil, and tools clean. Never reuse old plant matter in the tent – even one pest from a houseplant can infest your entire setup.
Conclusion
Pests and diseases are every grower’s nightmare – but no reason to panic. With regular inspections, stable conditions, and good hygiene, most problems can be prevented. If an infestation occurs, natural remedies like neem oil or beneficial insects usually solve it without harsh chemicals.ima-Kontrolle und natürlichen Mitteln wie Neemöl oder Nützlingen lassen sich die meisten Probleme schnell lösen – ganz ohne Chemie.
Flowering & Ripening – The Road to Harvest
For most growers, the flowering stage is the most exciting part – this is when your plants finally show what all the effort was for. However, it’s also the most delicate phase: even small mistakes can drastically affect yield and quality.
Beginning of Flowering
For photoperiod strains, flowering starts when the light cycle switches to 12 hours of light and 12 hours of darkness. The plant senses “autumn” and focuses its energy on producing flowers.
Autoflower strains, by contrast, begin flowering automatically after 3–5 weeks regardless of light schedule.
During the first weeks of flowering, plants often stretch significantly – sometimes doubling in height. Growers should plan space accordingly or use training to control it.
Care During FloweringNutrients:

Less nitrogen, more phosphorus (P) and potassium (K).
Humidity: 40–50%
Temperature: 20–26 °C (68–79 °F)
Airflow: Constant circulation to prevent moisture buildup in dense buds.
Determining Ripeness
Pistils (hairs):
White & upright = not ready
Brown & curled = maturing
Trichomes (resin glands):
Clear = immature
Milky = peak potency
Amber = more relaxing effect
Best harvest time: When most trichomes are milky and some have turned amber.
Conclusion
Flowering demands patience and precision. Those who manage nutrients and climate well and check maturity carefully are rewarded with dense, aromatic buds. The harvest timing determines potency, flavor, and effect – so close observation is essential.
Harvest, Drying & Storage – The Final Step
After weeks of care, it’s finally harvest time. But even now, mistakes can ruin quality. Proper handling after flowering determines aroma, potency, and shelf life.
Harvesting
Use sharp, clean scissors to cut the plants carefully. Some growers harvest whole plants, others work branch by branch.
Trimming (manicuring): Remove large fan leaves and some smaller sugar leaves – these contain less resin and can make the smoke harsher.
Drying
Place the freshly cut buds in a dark, stable environment:
Temperature: 18–20 °C (64–68 °F)
Humidity: ~50%
Duration: 10–14 days
Hang buds upside down or lay them on drying racks. Too fast = harsh taste and weak aroma. Too slow = mold risk.
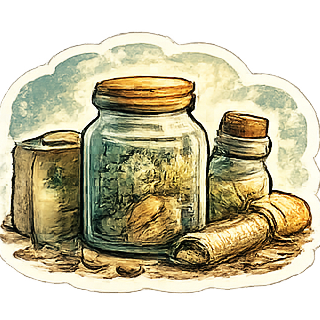
Curing – The Secret to Perfect Flavor
Once dry, buds go into airtight glass jars. During the first two weeks, open the jars daily for a few minutes (“burping”) to let moisture escape.
Curing can take several weeks – the longer it lasts, the smoother and richer the aroma becomes.
Storage
Properly dried and cured buds stay fresh for months. Store them in the dark, cool, and airtight. Mason jars or airtight containers work best. Avoid plastic bags – they let moisture in and alter flavor.
Conclusion
Harvesting is the highlight of the grow – but also the beginning of the final, crucial phase. Only through careful drying, patient curing, and proper storage can the buds reach their full potential. Those who take their time are rewarded with rich aroma, maximum potency, and long-lasting freshness.